Tuesday, December 16, 2008

My embroidery thread box


A few days ago Taschen asked on his blog about what type of thread to use to achieve a period look (He is working on medieval German reproductions).  There is some information out there about using spun silk vs filament silk, but I wanted to see a side by side comparison.  So here is a little sampler of the threads currently in my embroidery box on 28 count linen.  I included cotton and wool threads for comparison purposes and because I had them.  I really want to try the Devere silk and now that they have a decent website I plan to order some.

What are your favorites and how do they compare?

Soie Ovale untwisted filament silk, I bought this to try it so I only have the one color.  It is nice and flat, even with the two strands I had to use to get good coverage on the linen.

Soie Alger is spun and plied silk with 7 2-ply strands twisted together.  Even when the strands are separated  the twist is evident.  It has a nice sheen and comes in lots of colors and is easier to find than Soie Ovale.  I used the same color of Soie Alger and Soie Ovale but there is a distinct difference in the look and sheen.  This is one of my favorites because the multiple strands are easy to serarate for different counts of linen, it works nicely, and is available at my local store.  A single strand is good for blackwork.

Aurorasilk is 20/2 spun silk with a loose twist.  This is my current favorite embroidery thread.  It is available dyed with natural dyes or in cones of undyed thread.  A friend of mine dyes this silk and gave me a bunch so I have limited amounts and colors.  To me it looks similar to some period embroideries.  It is nice to work with and because it is thicker I only have to use one or two strands which makes it easier to keep the thread flat.  Naturally dyed colors give a wonderful period feel.

Trebizond is a tightly twisted spun silk that I included in the sampler because I have it although I would never embroider with it.  It is very difficult to keep the twist even; it untwists or twists more tightly while working which is noticeable in the finished work.  It has a lovely sheen, comes in a nice range of colors and works well for kumihimo (that's what I use it for).

Splendor is spun silk popular with embroiderers but I personally hate it.  I've had problems with fraying, my blackwork looked fuzzy, and the 12 strands are a pain to separate.  I used most of mine in kumihimo experiments just to get rid of it.  Soie Alger is similar but much easier to work with.  Maybe someone else can give a less biased opinion.

DMC #5 Cotton Perle is included for comparison purposes.

Medici wool is a very fine wool by DMC that was discontinued this year.  It is finer than crewel wook and good for fine embroidery but even on 28 count linen I had to use two strands.  
Paternayan tapestry wool is thicker than crewel wool.  Comes in many colors but many of them do not look like naturally dyed colors.

Wednesday, December 10, 2008

Angel Icon, step one


This photo is of my newest project, icon painting.  In this beginning step the drawing for the icon has been transfered to the gessoed wood panel with carbon paper, then the primary lines (outline, facial features, major clothing folds) have been scribed into the gesso with a pointed tool.  Next the halo and edges of the panel have been painted with red bole.  What I will do next is sand and burnish the bole so it is ready for gilding.  In the photo you can see the reddish smear in the angel's hair.  That is where I accidentally dropped a glob of bole.  I will be painting over this area later and the bole will not be noticeable.

There is a church in San Francisco that hosts icon painting classes twice a month and a very nice lady, Betsy Porter, teaches them.  They are drop-in, so you can go as often as you want. Each student is given assistance and guidance on an individual basis.  The cost per session is $10 - what an amazing bargain!  The instructor gives each new student an information packet (cost $10) and has a selection of professionally prepared gessoed boards ready for starting an icon, available at cost.  There are also supplies available for students to use, including pigments, bole, tools, etc.   For further information, including step-by-step instructions for writing an icon, please look at Betsey's web site www.betsyporter.com.

I have long been fascinated by icon painting and think that it dovetails nicely with my medieval interests.  Many current icon painters follow traditions that are centuries old and based on Byzantine painting tradition.  Traditional methods are followed as well, including painting on wood panels, using tempura paints made from egg and powdered pigments, and gilding.  I am very excited about this new project and hope the skills I learn will enable me to paint more icons on my own as well as enhancing my neglected illumination work.

Wednesday, December 3, 2008

Next up - scissors case


Isn't it funny how working on something enjoyable is much easier than something that is less enjoyable?  My last project seemed to take forever and I had to force myself to work on it.  If I hadn't made the rule about not starting a new project until an old one was finished I don't think I would have finished the purse.  I like it now that it is finished but I am glad I don't have to work on it anymore.

This new project is much more fun.  I really like the pattern, the colors and the project.  It is a scissors case for the West Kingdom Needlework Guild service project for 2009.  The instructions encourage the use of silver, but that is not really appropriate for German embroidery in my period of interest.  I may put a silver bead on it, but no thread.  It is due to be turned in by 12 Night 2009 so I can't let the project linger.  So far it is working very fast.

In the spirit of the holidays I posed the picture of the completed front of the embroidery in the branches of my Christmas tree.

Sunday, November 30, 2008

Whew! Another purse is done!


About the purse: 

The finished size of the purse is 4 1/4 inches wide by 4 3/4 inches high.  The sides and handle are needlewoven, the drawstring is 8 strand round kumihimo cord and the lining is linen.  I used aurorasilk fine 2-ply silk dyed by my friend Renee in three colors:  fustic (yellow), fustic with brazilwood (orange) and brazilwood (red).  The ground fabric is 24 count linen congress cloth. The pattern is one of the fill patterns from the Hildesheim cope charted by Master Richard Wymarc.

I am very happy to have finished this little purse. Now that it is done I can start working on the next item on my list. It will be a scissors case and it must be finished before 12th Night.

Wednesday, November 26, 2008

I finished some embroidery and learned that my cats like Cheerios


I had a ziplock plastic bag of Cheerios cereal in my work bag for snacking on my breaks.  Last night I came home from work and put my work bag down on the floor next to my bed.  Today I discovered the bag of Cheerios lying in the hallway outside my room.  The bag was chewed and torn and there were Cheerios all over the hall.  Silly cats, I already knew to keep sourdough bread double bagged or in a cupboard, but cereal, too?

The determining factor in the size of my new purse was the amount of yellow thread on hand.  The person who dyed the thread I am using is out of yellow so I used up what I had and made the embroidery as big as I could.  I thought it looked really small but it is the same size as the first pouch I made.  This time I decided to make the eyelets for the drawstring before stitching up the sides.  It is much easier that way.  Hopefully this holiday weekend I will find the time to finish the whole thing.

Tuesday, November 18, 2008


I came across the Exhibition catalog for this exhibit at Historiches Museum Bern earlier this year.  The exhibit will also be held in Brügge next year.  It covers the time of Charles the Bold of Burgandy (1433-1477) and there are many wonderful objects.  Everything in the catalog is the finest example of its type from painting to metalwork to embroidery.  The embroidery is too fancy for my taste; it feels unapproachable.  I did especially love two items in the catalog and they are shown here:  the marvelous purse and fantastic red doublet (or whatever this is called in this period; I don't know much about correct clothing terminology).  I absolutely LOVE the shiny red silk!

Monday, November 17, 2008

Progress on new purse


I started this purse a few months ago and my lack of excitement about it has slowed down all my embroidery.  I have resolved to not start another project until I finish this one.  Since I promised something (that I haven't started) by 12 Night, I need to get cracking and finish this project.  I'm sure when it is done I will like it, at least I hope so.  The pattern is one charted by Wymarc that I haven't seen executed.  It doesn't work well in small areas, a purse is the smallest item I can use it for unless I work it on super fine thread count.  I am using my favorite 24 count linen congress cloth.

Sunday, November 16, 2008

More from Kroos... now in COLOR!


On November 1st I posted a black and white picture from the Kroos book.  Thanks to Chris Laning of the Paternoster blog, I now have the same image in glorious color.  Enjoy!

Saturday, November 15, 2008

German counted satin stitch box! Color photo!


So much for posting more Wienhausen images next.  I was going through my files and found something I had forgotten:

Here is another photo find.  It is a reliquary from the end of the 13th Century (Maasland?), 3.5cm high, 6cm diameter.  The image is from a book called Ferne Welten - Freie Stadt: Dortmund im Mittelalter (Distant Worlds - Free City:  Dortmund in the Middle Ages), ISBN-10:  3-89534-617-9, ISBN-13: 978-3-89534-617-0, published 2006.  I found this book in the library; it is catalog of many varied items and only a few textiles, one of which is this charming box.  It is counted satin stitch, in color, and has a turk's head tassel!  It must be fine stitching for such a small box!

The box top looks like part of a tapestry or something that was cut down to make the box lid, perhaps something that was partly damaged?  It is sad to think about how many wonderful examples of textile artistry are gone forever, yet how many more still exist but are not known to many?  I love finding and posting pics like this because I feel that the more people see them, the better.  

Friday, November 14, 2008

Another German Tapestry... the Thomas Teppich from 1370


From Kloster Weinhausen comes the Thomas Teppich, embroidered wool, circa 1370.  This image of the full tapestry is from the book Meisterwerke der Niedersächsischen Kunst des Mittelalters.  I have some other scans of tapestries I think are more interesting, but this one is color and the the other ones I liked are black & white.

The detail picture is from the same tapestry but published in a different book, Kloster Weinhausen by Horst Appuhn (ISBN 3-9801316-0-2).  I actually own this one so can scan from it at will, instead of traipsing over to the library.  This book has 72 photographs (many in color) in addition to the German text.  The photographs are of textiles, the exterior and interior of the kloster including many wonderful wall paintings, furniture (chests), stained glass, sculpture, illuminations, etc.  I'm sure I'd learn a lot if I read German, but I get what I can from the pictures.  I'll have to start learning German in my spare time... heh, heh, heh...

One of the things I love about the Weinhausen book is the variety of things included in the photo section.  It is easy to see the continuation of the design aesthetic in everything that was made there, from the wall paintings, painted furniture and sculpture, stained glass, illumination, metalwork, and needlework.  If I were going to design an embroidery somewhat based on embroideries of the time I would also use these other objects as design inspiration. The wall paintings are especially inspiring to me.

I have scanned several examples from Weinhausen and will post those next.

Wednesday, November 12, 2008

German tapestry from 1200... another image from my library scans


I recently received some nice feedback from people who liked my posting of historical needlework photos that I scanned at the university library.  Work has been keeping me busy lately so I haven't been back in some time, but looking at these scans again does make me want more.

This is from a book called Meisterwerke der Niedersächsischen Kunst des Mittelalters by Horst Appuhn (1963).  The caption on the tapestry dates it to Halberstadt circa 1200.  The larger picture is The Tree of Jesse from Hildesheim, also circa 1200.  Sorry about the larger than usual file sizes but when I made them really small they were very pixelated.

Saturday, November 1, 2008

More from Kroos


It has been almost a month since I posted and the reasons are many. Much of my time and energy went into making my Halloween costume and decorating my house (I was queen of the spider-infested graveyard). Also I have three projects going at once. Right now I am working on finishing the dress I am going to wear next weekend. Meanwhile, here is another photo from the Renate Kroos book.

The book lists it as dating to 1400 and held in Hannover, Kestner-Museum Inv. Nr. WM XXII, 10. It is 90 by 245 cm (35.4 by 96.4 in). I like it because it has so many patterns.

Sunday, October 5, 2008

Not strictly medieval


OK, not really medieval at all. But it is what I have been doing lately. It's been weeks since I posted and weeks since I worked much on anything related to medieval arts and crafts.

Now it is Halloween prep season and I am making a new display this year as well as sewing a costume for the first time. I may post a picture of the outdoor display if it turns out well. It is mixed theme of scary graveyard and spiders. My costume is just to fit in as a denizen of a spider-infested graveyard. I also wanted something that could be vaguely steampunk or easily modified. So here is the first and hopefully the most difficult piece. It is a cropped jacket in black cotton velvet with a short puff sleeve. Instead of building the sleeve into the bodice I made the pieces finished and separate then cartridge pleated the sleeves to the bodice. Since cartridge pleating is Renaissance period it provides a tenuous link to period clothing. Also later if I decide to wear it as a vest the sleeves will be easy to remove. It is lined, and interlined with black canvas so it is stiff and supporting since it fits snugly. It will be worn over a black corset I have yet to make and a black skirt which has trapezoidal panels in front and knife pleating in back. The skirt is asymmetrical, shorter in front and long in back.

A headdress of wire for a spiderweb would be cool. I've never done any hats so that might be beyond me this year.

Wednesday, August 27, 2008

As promised, better pictures of the basketweave pattern pouch


These pictures were made using a scanner and include some of the details of the purse. When I see something I would like to recreate I am always interested in the details of the finishing techniques. As I gain experience this is less important but has been vital for my first projects (this is only my second pouch).

To make the lining, I whipstitched a piece of bronze linen to the back of the embroidery. I then folded the whole piece together, right side out, and tablet wove the sides together. I started the weaving at the bottom corner of one side of the purse (at the fold). I passed the weft thread through the warp a couple times, then started passing the weft through the warp from left to right, stitching the warp through the edges of the side of the purse. The weft thread emerged from the purse edge on the left and I then passed the weft through the warp from left to right. The cards were turned after every time I passed the weft through the warp.

Once I wove up to the top of the purse I kept weaving in a normal manner, passing the weft through the warp from left to right, rotating the cards, passing the weft from right to left and rotating the cards again. This wove the strap of the purse.

When the strap was long enough I once again started weaving the purse edge, this time starting at the top edge of the purse side and working my way down. Before I started I made sure the strap was straight. I wouldn't want to have finished weaving the second side of the purse only to discover the strap was all twisted. I think I would have lost my mind if had done that.

At the end of the purse I stitched into the warp a couple times and tied off the weft. The leftover warp thread on both bottom ends of the purse formed part of the tassels.

So, how did I maintain tension as I was rotating the purse and weaving the second side? Is there a good way to do this? I don't know. I used my hand to hold the purse and strap and maintain tension manually while I used the other hand to pass the weft and rotate the cards. It was very awkward. I had planned to take pictures of the process but it didn't work out. Maybe next time if I ever try this again.

The top edge of the purse, where the linen lining was attached to the embroidery, didn't look finished to me so I did a stem stitch along the edge to cover the seam.

The drawstring resembles fingerloop cord but is actually kumihimo (I used 8 bobbins). Fingerloop would have been more authentic but I am really bad at it.

The holes for the drawstring cord to pass through were made with an awl and not finished in any way. According to descriptions of extant pouches this is how many of them were made. I will just have to see how this holds up to use. My last pouch I did buttonhole stitching on the eyelets so this is a new technique for me. It makes me feel nervous to do this to my embroidery that I put so much work into.

Materials: 2-ply silk thread from aurorasilk.com dyed using fustic for the yellows, indigo for the blue and fustic/indigo for the green; 24-count linen congress cloth from Needle in a Haystack (www.needlestack.com); bronze linen from my stash. I put samples of all the threads in a sunny window for several weeks. The fustic did not fade at all, nor did the green. The indigo faded slightly but still looks pretty. As I plan to store this pouch out of the light I think it will be fine.

Sunday, August 24, 2008

Basketweave embroidered pouch - done!


It was two months and one day ago that I first posted about making this pouch. That is not actually a long time but it felt like forever to me. I was so excited to have it finished that I took this bad picture to post. Later I'll photograph it in natural light and get better pictures of the details.

The finished bag is 5.5 inches wide and 5.25 inches tall. The sides are finished with card weaving. I used 8 cards: 4 S-threaded, 4 Z-threaded, all the cards turned forward continuously. I elected not to use fancy patterns or multiple colors for the weaving because I wanted the simplicity of the weaving to set off the complicated embroidery pattern instead of being a distraction.

The tassels on the bottom are very simple and I did not put tassels on the drawstrings. I was not sure how complicated I wanted to get with that so I chose to leave it more plain. Later I can change it if I decide I would like that better. Now I just need to enjoy looking at it for a while.

Overall I am very pleased with the result. I plan to wear it with a simple gown so attention is drawn to the pouch.

Saturday, August 23, 2008

Maru dai completed, now I have three!


It feels like such a long time since I last posted when it has really only been a couple of weeks. I took a week long hiatus from doing any craft type activities for a couple of reasons. First, my wrist was hurting and I thought a rest would be good for it. Second, I just started a new job and wanted to focus my energy on work.

Now it is almost time for school to start again. For me that means back to the woodshop and starting a new project. In order to be ready for new things it is time to finish off the old things. This week I finally finished these maru dai (stands to use for making kumihimo cord). I have been using them in their unfinished state and they worked fine, but it is good to have them done.

I chose three different heights as an experiment to see how it would feel to work with different sizes. The shortest one has 12 inch posts. It is convenient to use when sitting although I do have to tie up the cord coming out the bottom more frequently. The middle one has 17 inch posts. It was the first stand I made so the one I have used the most. It is not convenient to use with the tables I have at home but it is a good height when I set it on a low stool or when I am standing. The third stand is 24 inches high and is my favorite. It sits on the floor when I am sitting to weave or on a coffee table if I want to stand. Because it is tall I don't have to worry as much about tying up the cord. The drawbacks are that it takes up more space to store and was expensive to make, especially because I used walnut.

The tall and short stands are walnut and the middle height stand is red oak. The walnut is so beautiful but so much more expensive than other woods. I probably spent over $30 just for the wood in the tall stand and $18 for the short one. The oak was about half as expensive. I used a gel stain on all the wood, rubbed in by hand. This went on much better and more controlled than the liquid stain although it was harder to find a store that carried it. The walnut is stained with a dark walnut stain, the oak with a color called "Provincial" (a light-medium golden brown). All the stands are finished with multiple coats of Mylands wax, a blend of beeswax, carnuaba wax and other stuff not mentioned on the label. The wax gives a nice low sheen and doesn't make to wood too slick and cause the threads to slide around too much when in use.

Each time I make something new in wood I learn a new lesson. This time the lesson was: don't skimp on sanding with the low grit sandpaper to get the big scratches and flaws out. The finer grade sandpaper won't do it the flaws really show up when the piece is finished.

Friday, August 8, 2008

I'm trying to tablet weave


I am learning to do cardweaving so I can finish my basketweave pouch. Here are the practice samples I made so far,all using cheap crochet cotton. I only had one pattern, for the blue and white sample from the class I went to. It is a really nice pattern but will be wider than what I am looking for. What I really need is patterns for some narrow trim and I am not happy with my efforts to just figure something out. The book I have has all these fancy patterns and brocade. That's like college level equivalent. I am looking for kindergarten. This is a work in progress.

I made a little progress with my scissors case. I really like it so far. Another work in progress...

Thursday, August 7, 2008

On looking for newer photos of old embroideries


It is wonderful to have some books about embroidery that were amazing resources when they were published, especially since nothing as good or complete has been published since. I am thinking specifically of A Pictorial History of Embroidery by Marie Schuette in 1964 and Niedersächsische Bildstickereien des Mittelalters 1150-1450 by Renate Kroos in 1970. At the time they were published fewer color photographs were used in books than now. When trying to recreate these embroideries or use these references as sources for documentation one thing is missing: color. Granted, many of the colors look very different now than they did when new due to fading but seeing them in color really does give a different impression.

I would love to have my two favorite references redone with updated photos. If I were more of a scholar and felt myself up to the challenge and had the time and money to do the traveling that would be required, I'd do it myself. Since that is not possible I will just keep looking for new resources.

Here is something I found yesterday. The b/w photo is from the Kroos book. The color photo is of the same piece but a different section. It is reproduced smaller as the actual book size is smaller but it was very wonderful to see the color. The book is Kostbarkeiten aus dem Domschatz Halberstadt and is a museum publication available on the Domschatz Halberstadt website http://www.dom-und-domschatz.de/publikationen.htm. It is a thin book containing information and photos for various items in the museum, including a few textiles.

Tuesday, August 5, 2008

Take a look at an interesting new(er) blog

Chris Laning of Paternosters (http://paternosters.blogspot.com/) sent me the link to this blog (Taschen at http://medievalpurses.blogspot.com/) and I really liked it. He is just getting started but his work is really nice and judging by the lack of comments not many have seen it yet. Hooray! Another brick stitch purse maker!

Saturday, August 2, 2008

Starting something new - a scissors case


Right now I am intermittently working on my tablet weaving skills so I can finish the basketweave embroidery pouch, but meanwhile I have to have another embroidery project going. This new project is going to be a scissors case. I wanted to use a pattern from my recent library research and I kept coming back to the design I scanned in the picture above. In order to incorporate such a detailed design into the small size of the case I decided to use 40 count linen. The design looks really good and not too large and crude with this finer linen (I normally use 24 or 28 count), however it is difficult to see. I am using a magnifier to see the stitching when I work. I don't think this is good for me over a long time so I only embroider for short periods of time then give my eyes a rest. Therefore I think this will take a while unless I am diligent and work on it every day. Who knows if that will happen?

The scan is from the Renate Kroos book and the embroidery is from Halberstadt circa 1270/80. I am using two strands Soie d' Alger silk floss.

Saturday, July 26, 2008

Basketweave pouch embroidery complete!


Last night I finished the embroidery for my new pouch. I couldn't decide on a color for the spaces between the gold embroidery so I used two different color schemes in such a way that the purse will look one way from one side, and different on the other side. I was worried that the blue would be too strong but it looks really good. When I finished with the blue embroidery my fingertips were a little darkened; I think some of the indigo rubbed off as I stitched. I have had samples of all the colors I used taped in a sunny window for a couple weeks now and so far no fading. Next thing is to put the pouch together but that will have to wait a bit until I practice cardweaving some more since I want to weave the sides together, so it will likely be weeks before I have a finished pouch to present. Meanwhile I need to get a new project that will fit in my purse and be good to work on under adverse conditions such as on the bus and at night.

Thursday, July 17, 2008

Progress on basketweave embroidery


I like to post at least once a week and to have something to show, but the project I am working on is not to be finished in a week. Here is the updated picture. I am happy because today I finished the basketweave outline for the entire piece. It was my goal to have that done before going to learn cardweaving tonight and I achieved my goal.

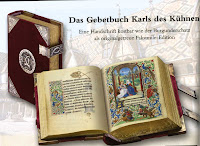
Brickstitch roof?


I was flipping through the pages of the magazine at the art library yesterday and came across this advertisement for a fascimile of the Prayer Book of Charles the Bold. The book is featured at an exhibition at Historisches Museum Bern about Charles the Bold (1433-1477). Look at the roof in the background - doesn't it look like a brick stitch pattern? I wish I knew where that building was, it looks really cool.

Wednesday, July 16, 2008

More research at Stanford Library


Here are the first of some of the wonderful things I scanned at the Stanford Art and Architecture library today. I chose the picture of this aquamanile because of the depiction of the late 14th century clothing, which I want to make ( I love tippets!). In another photo of the back of this piece it is possible to view her hairstyle which appears to be a fishtail braid.

This aquamanile depicts Phyllis and Aristotle and was made in the South Lowlands in the late 14th century.

I would really love to learn metalworking, especially blacksmithing and casting, also enamelwork.

Tuesday, July 15, 2008

A&S 50 Challenge: new skill - Inkleweaving


Here is my first attempt at inkleweaving. I attended a class at an A&S and put that information together with the book Inkleweaving by Helene Brass to come up with the inkle loom and my first weaving. As you can see it is not very good. The loom I made in woodshop in maple with birch dowels. It is not finished yet but I didn't want to wait until it was finished to try it. I hope it doesn't take me too long to get good with this technique because I would like to make something in fiber more period than the crochet cotton I chose for learning because it is cheap.

Wednesday, July 9, 2008

Happiness is mine!


Look at this picture!  Isn't it wonderful!?

I have worked at Stanford University Hospital for over five years and never visited the campus library.  Today I went and I now have a big smile that won't leave my face because there were so many wonderful books.  I am not allowed to check any out, just to put them on hold and make as many scans as I like.  I wandered the stacks in a state of bliss.  With the research I can do here I will be able to make as many embroidery patterns as I like.  I am so happy it doesn't even matter that I wore very inappropriate shoes for walking around on campus and my feet bled or that it was 100 degrees and my refrigerator broke.

Most of the books with good pictures are older and the pictures are mostly b/w but I did find a few color photos.  Here is the best color photo that I found today.  The book is in German which I do not understand except with the help of Google translator.  It has a few pictures of embroideries but only this one color photo of the counted satin stitch/brick stitch which is my focus.

    Appuhn, Horst.  Kloster Isenhagen Kunst und Kultur im Mittelalter.  Lüneburg, Museumsverein für das Fürstentum Lüneburg, 1966

Note that in the picture there is the outline of a donkey(?) that is not filled in with embroidery. I like the unfinished bits because they give clues to how things were made.  Also my first impression with my modern point of view is that the angels are holding forks with fish speared on them for roasting over a fire and that it looks like baby Jesus is being served up on a table with the cow salivating over him.  However I am certain that is not the correct interpretation.

Wednesday, July 2, 2008

Making progress...


Here is an updated photo of the basket weave embroidery pouch I am making. I was undecided about the color for the spaces in between the weave and I still have a few trial color places to rip out. The silk feels SO soft and has a beautiful luster.

Friday, June 27, 2008

Kumihimo: eight bobbin flat cord


I tried a new kumihimo pattern. This eight bobbin pattern was more fun than the last one I tried. I used crochet cotton because it is cheap. At the end of the cord I split it into two group of four cords and made a four bobbin cord from each one. That has interesting possibilities. It looks a little different on each side; I like the zig-zag side better.

Thursday, June 26, 2008

A quickly written Needlebook Tutorial

Someone posted a request on h-needlework about how to make a needlebook. I do not have any information on the historical accuracy or use of needlebooks in period (SCA, that is) but the books I make are small and practical. I would love to hear from anyone that has information about needlebooks in period.

I have made several as it is a great small way to try out a pattern, material or technique and get a usable item as a result. They also make great gifts. My first needlebook had many pages and I still use it, but it is a bit bulky. The small roll up design (from an older post, below) is great for tucking into my purse for a carry along project. At least it was until I lost it recently. The little roll up model, some thread, embroidery scissors and a small project (like another needlebook) fit easily into a small ziplock bag.

The design I make now has only two pages which are actually one piece of fabric folded in half and stitched through the middle to the lining. I like to put the same size needle on each page and I have different needlebooks for different types of needles. I keep one book for the needles of my current project. I also make my needlebooks with a little pocket on the inside. The pocket holds my needle threader so it is always in the same place as my needles. It is less easy to forget things when they are all together!

A small needlebook that is big enough to hold most needles need only be two inches by three inches (or 5 by 8 cm) when closed. Or make one as big as you want.


The picture above shows different views of my most recent needlebook. The cover is two pieces of linen sewn together; one has the blackwork and the other is plain red linen that matched the wool I used for the lining. The inside picture shows the pocket attached to the lining with the pages turned to one side. This needlebook is approximately 2.5 by 4 inches.

Needlebook cover

The cover can be a single embroidery folded in half, two embroideries, or half embroidery and the back side plain fabric. Do whatever you want, there are lots of options. The "spine" can be left plain or have a ribbon or cord attached so as tie the book onto a belt.

Lining the needlebook

I line my needlebooks with felted wool. It is thick enough to give the book structure so I do not have to add cardboard or some other stiffening (keeping it simple). For embroidery that will cover the entire surface of the base fabric I use linen congress cloth because it is stiff enough that it can be easily worked without a hoop (fits into my purse) and provides some additional stiffness to the needlebook.

Cut a piece of felted wool the same size as the cover; stitch together. Leave a gap in the stitching where the cords to tie the book together will be placed. It will be much easier to attach the ties by sewing them into the seam if there is a little gap for them to fit into. Or, don't leave a gap and learn this the hard way. Sometimes that is the only way some of us learn.

The pocket is a piece of fabric cut exactly half the size of the lining. Turn under the edges 1/4 inch (or 0.5cm) and stitch to the lining. I place the opening of the pocket towards the center of the book rather than the edge. That way things don't fall out and get lost.

Now cut another piece of felted wool slightly smaller than the finished size of the book (about 1/4 inch or 0.5cm), and stitch it to the lining down the middle to create two pages. Trim any excess as needed. The nice thing about using felted wool for pages is that the edges do not have to be finished in any way because the wool does not fray (again, keeping it simple).

Tying it together

I use ties of the same cord as the edging to tie my books together. Just make sure to think about where the ties will go before stitching the cover to the lining or finishing the edge seam. I like to stitch the ties in before I finish the edges. Sometimes I get excited and forget, then when I realize this I say curse words.

Another method of closing is to use a loop and button. Here is an opportunity to use a pretty button!

Finishing the edges

When the outside and lining are stitched together there is a seam edge which may be left plain or the edge can be finished in various ways. I think a finished edge adds a special touch.

One way to finish the edges is with an embroidered braid. There is an excellent tutorial on the Medieval Silkwork blog here:
http://m-silkwork.blogspot.com/search/label/tutorial
This technique looks nice and has period documentation. I fingerlooped a matching cord to tie the book shut using only two loops.

Another technique is to sew a ready made cord to the seam. I have tried fingerloop braid and kumihimo. I generally use kumihimo because it is so much easier for me to do and my kumihimo looks nicer than my fingerloop braiding.

A third technique is to use tablet woven edging. Maxlu179 has a very nice photo of this type of edging in progress on a pouch he made:
http://maxlu179.livejournal.com/8947.html

I hope this information is helpful to anyone who is interested in making a needlebook. They are really fun!

Monday, June 23, 2008

Starting a new project - an embroidered bag


There was a convergence of two things for me: a bag I really wanted to make and the material I wanted to make it with. I fell in love with this bag the first time I saw it at diu-minnezit but didn't want to make it until I had a little more embroidery experience. Then Renee of the Mists gave me this wonderful spun silk thread that she dyed herself. She probably thought I was never going to use it because months went by and I never did, but I was just waiting for the right time because I knew I wanted to use it to make this embroidery. I used to draw basketweave patterns in high school when I was bored in class and I still love them. I have seen this pattern a couple of times in period embroidery so now I am going to have to track down exactly where I saw it.

Materials: 24 count linen, spun silk from www.aurorasilk.com dyed by Renee with fustic and brazilwood with alum mordant.

Saturday, June 21, 2008

Blackwork cat... on a needlecase!


I first remember seeing this cat depicted in a needlework sampler a while back before I ever thought of doing any blackwork myself, so I didn't make any effort to remember it. Then I saw the picture again in Liadain's Practical Blackwork blog and I knew I had to make it. The picture can be found on the V & A website; it is museum number T.326-1921, a sampler found in a burial ground in Egypt dated to 14th to 16th century in silk on linen. The little cats were missing some stitches so I had to do a little reconstruction but I think it came out pretty well. I took more liberties with the tree because it had to fit into my design area.

It didn't come out perfect; I made a mistake on a couple of the leaves and the flower things at the end of the two branches are not identical because I wasn't sure which way I wanted to do it. I liked the one on the right better. Still, it came out pretty good and I just had to make it into another needlecase. My friend Renee likes cats and I have been wanting to give her a needlebook but didn't think the others I've made so far would be right for her; this one is perfect.

I make the other side of the book red linen and lined it and made the "pages" of the book out of red wool. The ties and seam edging are black and white silk four bobbin kumihimo cord.

Materials: 28 count evenweave linen, single strand Soie d'Alger silk floss in "Noir".

I love the little cats with their crowns so much I will probably embroider them on something else but I'm not sure what.

No sense throwing good effort after bad...


I decided to make another embroidered pouch, this time using wool. In the past I have done all my brick stitch embroidery with cotton or silk. I used two strands of Medici wool on 24 count linen congress cloth. As can be seen in the photo the coverage was not the best. I could have used four strands and it wouldn't have been too much. At first I was going to keep going because I didn't want to throw away the work I put into it, but I likely would not want to use the finished piece because of its substandard appearance so that would be even more work wasted. I still want to work in wool, I just need to plan better.

Saturday, June 14, 2008

Good photo of Vyncent, bad photo of blackwork


I swear I am such a dunce sometimes. I think because I have seen it with my eyes that I got it in the picture. Here is a lovely photo of Master Vyncent after his Laurel ceremony. Congratulations, Vyncent! He looks wonderful in slashed silk satin and in the photo you can see the collar and cuffs of the blackwork shirt I made but not the fancy part, aargh! So I still have no photo of the finished piece.

A&S was fun with many great classes. I learned about beading so maybe that will be an upcoming project. I had planned to finish my dress for A&S but was sidetracked making the shirt, however I did get the hem sewn on for real. Last time I wore it I had tacked the hem down with one inch stitches!

Wednesday, June 11, 2008

Blackwork shirt is finished!

Last night some of the people who are making Vyncent's Laurel outfit got together to work on their various projects. I managed to finish the blackwork shirt I was working on - thanks Crystal for hemming it and Cin for making the rest of the ties. It looks great with the rest of the outfit. His doublet is amazing! Unfortunately I forgot to take pictures after it was finished so this weekend at A&S I will be sure to bring my camera and take some photos.

Monday, June 9, 2008

Another needlecase....finished!!


I am supposed to be finishing the blackwork because my deadline is this week but I so very much wanted to see how this would turn out that I went ahead and finished it. My front garden is looking really lovely right now and the weather is so beautiful so I posed the needlebook outside. I took a picture of the inside so it is possible to look at how I make the inside. It is lined with wool and has two wool pages which are one long piece sewn down in the middle. There is a pocket on one side with the opening towards the center so things don't fall out. I like to store a threader in there; it is so handy to have one right with the needles.

So, now that I've had my bit of fun it is back to work and the next post will be the completed blackwork shirt.

Materials:

24 count linen congress cloth
DMC cotton embroidery floss, four strands for embroidery and six strands per bobbin for edging and ties
wool scraps from my garb material box for lining
kumihimo - four bobbin cord used to cover edge seams and for ties

Friday, June 6, 2008

Another needlecase...


Thanks Helene! (see the link to Helene's blog in the "Blogs with neat stuff" list at right) Helene patterned a motif from a German embroidery similar to one I had been thinking of patterning. Now I don't have to. In the picture of the original I noticed that the motif I wanted was also in the embroidery. I looked at her pattern and saw how I could easily adapt it for what I wanted. I used four stands of DMC cotton embroidery floss on 24 count linen Congress cloth (which is quite stiff). I am going to make a needlebook out of it. Yes, I keep making them but I find it is a nice way to try something out because the size is small and I like to make usable things. I don't want a bunch of stitching samples that I just keep in a box. Since I liked the pattern I am going to do it again, this time in wool and it will be a pouch, I think. I am still working on Vyncent's blackwork shirt but this little project was my carry around project to fit in my purse. I worked on it during free time/breaks at work. I couldn't take the shirt there so it doesn't count as a distraction, really!

And the colors are really that bright. They will show up nicely against my navy blue wool dress. It looks better in person than in the photo.

The cord next to it is a four bobbin kumihimo cord made with the DMC floss (six strands per bobbin). I am going to use it for ties and to cover the seams.

Monday, June 2, 2008

Wood painting bridge for illumination


I realized it has been two weeks since I last posted. I have been busy sewing Vyncent's blackwork shirt but I won't post pictures of it until it is done. He has to wear it in less than two weeks, so that will be soon. As a diversion (because I get bored doing any one thing for too long) I decided to finish up a couple old projects.

This is my first woodworking project. It is a bridge for illumination painting. One places the hand holding the paintbrush on the bridge instead of the paper, keeping the work clean. It is made of poplar with walnut dowels and stained with natural color finish and paste wax. The bottoms of the feet are covered with brown felted wool.

Saturday, May 17, 2008

Progress on blackwork shirt


Work on the blackwork shirt for Vyncent continues. I finished the embroidery for one side of the collar and have sewn it to the ruff. It came out even better than I anticipated and I am very pleased. It looks like I got a spot of blood on it so I will have to take hydrogen peroxide to it. I am working on the embroidery for the inside of the collar now.

Wednesday, May 14, 2008

A new look for my blog!

Holy cow! I made a cool new title and edited the template html and made my blog look way more spif!! Hey, Troye, I was paying attention!

A different needlecase design


I liked the zig-zag background pattern from my last needlecase so much that I decided to use it for another needlecase. I wanted to make something small so I can take just a few items and fit them in a little pouch to take with me when I am in garb.

I am getting better at making up the finished items. This time I remembered to leave little holes at the corners when sewing it together for the ends of the cord edging to tuck into. Unfortunately, I still had my iron on the linen setting when I ironed the lining (after I sewed it in, of course) so it now has an "antique" or a "dirty" look on the inside, depending on one's viewpoint.

Materials: three strands of Soie d'Alger (silk), colors CREME and #1723 (blue) on 28 count evenweave linen, lined with worsted wool, ties and edging are 4 bobbin kumihimo cord with two strands of the Soie d/Alger embroidery thread per bobbin.

Sunday, May 11, 2008

Making a blackwork shirt for Vyncent


Vyncent is going to be a Laurel! Hooray! Of course he needs a new outfit. But wait, it is next month! How can he get everything together by then? Of course, by enlisting friends to help. So I started out volunteering blackwork embroidery for collar and cuffs. Of course, the ties would look better in the same thread so why don't I make those, too? And because I am such a control freak, why don't I just do the whole shirt as well? So, other projects are now on hold for the most part so I can put all my effort into finishing this. So far I have done buttonhole edging for 60 inches of collar ruff and 16 inches of collar embroidery out of 36 inches total needed.

Pattern: from da Sera, Domenico. Opera Noua composta per Domenico da Sera detto il Francoisino. Venice, 1546. As charted in The New Carolingian Modelbook by Ianthe d'Averoigne.

Material: single strand Soie d'Alger "Noir" silk thread on lightweight non-evenweave linen.

Of course, this qualifies as an A&S 50 Challenge project for depth in embroidery.

Thursday, May 1, 2008

Kumihimo: four and eight bobbin cord


I saw in the Yahoo A&S 50 digest some discussion of Kumihimo cord so I thought I'd post the eight bobbin cord I just finished. It is the green and yellow one. The red and white is a four bobbin cord for comparison. Both are made from Trebizonid silk, one strand per bobbin. It really is lovely and makes great cord. I use it for chemise ties, to finish the edges of my embroidery projects, and plan to use for lacing of garb and whatever else I can think of. The Weavershand website (link on the right under "Links I like") had lots of information on kumihimo as well as inkle, fingerloop and a host of other things.

Thursday, April 24, 2008

Original pattern #1 completed piece


Here is my first completed example of an embroidery project from of my own creation. The central motif came from the Goess vestments, the two background patterns are fairly common in German embroidery in the medieval period. I wanted to test out which I liked better so I decided to do half each. The background patterns blended with the motif perfectly, something I was trying to achieve.

Finished size (open): 12.5 x 7.5cm

Materials:

*Zweigart 28- count linen
*felted red wool for lining and "pages" of book
*Edging and tie: a 4 bobbin braid using Trebizonid (a 3-ply filament twisted silk) red #4015 and white
*Embroidery floss: 3 strands of Soie d'Alger, colors "CREME" (white), #2122 (green), and #2924 (red)